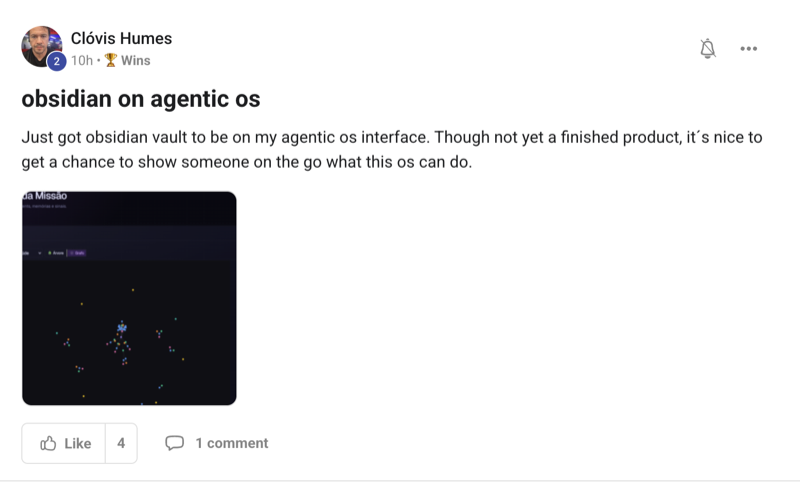
The DeepSeek harness install takes about 30 seconds and gives you DeepSeek V4 Pro, Kimi K2.6 and Miniax M2.7 for free.
That's not marketing language — I literally timed it on a clean MacBook this morning.
If you've been scared off setting up local AI coders because Ollama configs make you cry, this post fixes that.
I'll walk you through the entire install plus my first-day workflow so you ship something useful today.
Before you install — what the DeepSeek harness actually is
A quick context-setter so you know what you're installing.
The DeepSeek harness is the runtime layer that turns DeepSeek V4 Pro from a raw model into a working coding agent.
The harness most people search for is called FreeBuff and it ships free from the CodeBuff team.
FreeBuff lives in your terminal, reads your files, writes new ones, runs commands and opens a real browser to test what it builds.
It's not Ollama, it's not local-only, it's not an IDE plugin — it's a terminal agent with the top free coding models built in.
Now, the install.
Step 1 — Make sure you have Node.js
The DeepSeek harness is a Node.js global package, so Node has to be installed first.
Open your terminal and check.
node --version
If you see a version (anything 18 or higher works), you're good.
If you don't, install Node from nodejs.org or via Homebrew on Mac.
brew install node
This is the only "real" install step — everything after this is genuinely seconds.
Step 2 — Install the DeepSeek harness globally
Now the magic line.
npm install -g freebuff
That's it.
The -g flag installs FreeBuff globally so you can run it from any project folder.
On a fast connection this takes about 10-15 seconds.
If you get a permissions error on Mac, prefix with sudo and try again.
sudo npm install -g freebuff
If you're on Windows, run your terminal as Administrator the first time.
Want my full FreeBuff setup video + the prompt templates I use daily? Inside the AI Profit Boardroom, I've recorded the Mac, Windows and Linux walkthroughs plus shared the prompt packs that produce shippable code from the DeepSeek harness. Get access here
Step 3 — Run it inside your project
The DeepSeek harness needs a project folder to work in.
It scans your files, indexes them and uses that context for every prompt.
So cd into the folder of whatever you're building.
cd your-project
freebuff
That's the entire install flow.
npm install -g freebuff
cd your-project
freebuff
Three lines, no card, no API key, no signup.
If you came here from a Claude Code or Cursor setup that took an hour, you're going to laugh out loud at how fast this is.
Step 4 — Pick your model on first boot
The first time you run freebuff, the harness asks which model to use as your main coder.
The four main coding models inside the DeepSeek harness are these.
| Model | Best for | Pick when |
|---|---|---|
| DeepSeek V4 Pro | Complex multi-file work | You're doing real feature development |
| Kimi K2.6 | Long context tasks | Your codebase is massive |
| Miniax M2.7 | UI and creative front-end | You're building a landing page |
| DeepSeek V4 Flash | Quick edits and chat | You want speed over depth |
I default to DeepSeek V4 Pro for almost everything serious.
I switch to Flash when I'm doing trivial edits and want speed.
I switch to Miniax M2.7 when the UI quality matters more than the logic.
You can change model mid-session, so don't agonise on the first pick.
For deeper coverage of the model family, my DeepSeek V4 tutorial is the companion read.
Step 5 — Run the interview command first
Don't just type a vague request and hit enter.
Type /in first to launch the interview mode.
The planner sub-agent will ask you 5-7 questions about scope, acceptance criteria and edge cases.
This is the single biggest unlock I've found with the DeepSeek harness.
A 90-second interview at the start saves an hour of rework at the end.
Most people skip this and the agent guesses at what you wanted.
Don't skip it.
Step 6 — Use file mentions to focus the harness
When you know which files matter, tell the harness.
Use the @filename syntax mid-prompt.
Refactor the auth flow in @src/utils/auth.ts and update @src/components/Login.tsx accordingly.
The file picker sub-agent is good, but pinning it to known files removes guesswork.
Every second the harness saves on file discovery is a second saved on your bill — well, your time, because the bill is zero.
I cover the same focus principle in my Claude Hermes agent post for a different system.
What the 9 sub-agents do for you
The DeepSeek harness isn't one big model trying to do everything.
It's nine specialised sub-agents working together.
- The file picker scans your codebase and pulls only the files relevant to your task.
- The code reviewer reviews every change before it ships and flags risky edits.
- The browser-use sub-agent opens a real browser and tests what was built.
- The planner maps tasks in order during the
/ininterview command. - The editor makes precise surgical diffs instead of rewriting whole files.
- The researcher uses Gemini 3.1 Flash Lite to pull docs and external context.
- The terminal runner executes shell commands and reads back the output.
- The deep thinker can call GPT 5.4 if you have a ChatGPT subscription.
- The follow-up suggester drops three clickable next actions after every response.
Each sub-agent stays in its own lane.
That separation is why the harness doesn't go off the rails on long tasks.
If you've ever watched Claude Code or Cursor go down a rabbit hole, you know why this matters.
The architecture is closer to a Hermes agent OS setup than a single-model loop.
What to build first with the DeepSeek harness
Don't start with your biggest project.
Start with something small enough to finish in one session.
Here are six things I've shipped with the harness that all took under an hour each.
1. A static landing page
I gave it a one-paragraph brief and it shipped HTML, Tailwind styling and a working contact form in 11 minutes.
Miniax M2.7 was the model that did this best.
2. A bug fix in an existing project
I pointed it at a Node CLI tool and asked it to trace a flaky test.
It fixed the bug in 8 minutes and the code reviewer sub-agent flagged a second related bug.
3. A new template for an Eleventy blog
The file picker scanned 200+ files and found the four it needed.
The harness shipped diffs across all four without breaking the build.
4. A web research task while coding
I asked it to look up the latest Stripe webhook docs mid-build.
The researcher sub-agent pulled them, summarised the changes and fed them back into the main coder.
5. A planned feature using interview mode
I ran /in and the planner asked me seven questions before writing a single line.
The output shipped 20% faster than my usual workflow.
6. A small CLI tool
I shipped a Markdown-to-TSV converter for my spreadsheet tracker in about 6 minutes.
This is the kind of micro-tool that used to take a whole evening.
If you want more project ideas, the agentic AI OS post has a longer list.
My 5 tips for getting 10X output from the DeepSeek harness
These took me a few sessions to learn.
Tip 1 — Always start with the interview command
Type /in and let the planner ask you questions first.
This is the highest-leverage habit you can build.
Tip 2 — Use file mentions aggressively
Don't make the harness guess which files matter.
Pin them with @filename syntax and watch your output get tighter.
Tip 3 — Pick the right model for each task
Flash for one-line fixes, V4 Pro for serious feature work, Miniax for UI, Kimi for big-context refactors.
The harness lets you swap mid-session — use that.
Tip 4 — Run the code reviewer before shipping anything
This is non-negotiable.
The reviewer catches silent bugs that bite you in production.
It takes 30 seconds and saves rollback panic.
Tip 5 — Treat the harness like a junior dev, not a magic box
Junior devs ship great code when you give them clear context, examples and acceptance criteria.
Same applies here.
A vague prompt produces vague code.
Troubleshooting common DeepSeek harness install issues
If the install doesn't work first time, here are the usual culprits.
| Error | Fix |
|---|---|
| "command not found: freebuff" | Run npm install -g freebuff again, check the -g flag |
| EACCES permission error on Mac | Prefix with sudo or fix npm permissions |
| Node version too old | Update Node to 18+ via Homebrew or nodejs.org |
| Windows PATH issues | Restart terminal after install, or run as Administrator |
| Behind a corporate firewall | Configure npm proxy with npm config set proxy |
If none of those work, run npm cache clean --force and reinstall.
That clears the 95% of weird npm gremlins.
For deeper terminal setup, my free Claude Code workaround covers similar terrain.
How the DeepSeek harness stays free
The honest answer is text ads.
Small unobtrusive text lines between agent responses in the terminal.
Not pop-ups, not banners, not video — just text.
I genuinely forgot they were there after the first hour.
The CodeBuff team monetises the paid parent product (CodeBuff) and uses FreeBuff as a free tier with ad-supported access to DeepSeek V4 Pro, Kimi K2.6, Miniax M2.7 and DeepSeek V4 Flash.
No card, no trial, no cap.
That's it.
If you've been burned by "free" tools that bait-and-switch into paid tiers, this one genuinely doesn't.
🔥 Want my exact DeepSeek harness workflow + prompt templates? Inside the AI Profit Boardroom, I've shared the prompt pack I use daily plus the 30-day FreeBuff roadmap from install to shipped apps. → Get access here
Watch how the AI Profit Boardroom works
Here's the wider system this slots into.
DeepSeek harness install FAQ
How long does the DeepSeek harness install actually take
About 30 seconds for the npm install plus another 5 seconds to cd into your project and run freebuff — under a minute end to end.
Do I need a credit card to install the DeepSeek harness
No, the DeepSeek harness install does not ask for a credit card, payment method or trial signup at any point.
What if I don't have Node.js installed yet
Install Node.js from nodejs.org or via Homebrew (brew install node on Mac), then run the FreeBuff install — Node 18 or higher is required.
Can I install the DeepSeek harness without admin rights
You may need sudo on Mac/Linux or Administrator on Windows for the global install — alternatively configure npm to install globals in a user-writable directory.
What's the first thing I should do after installing the DeepSeek harness
Run /in to launch the interview command, let the planner sub-agent ask questions about your task, then watch it ship code based on a proper brief.
How do I update the DeepSeek harness when there's a new version
Run npm install -g freebuff@latest to update — the harness will use the new version on next launch.
About Julian
I'm Julian Goldie — AI entrepreneur, SEO expert, and founder of the AI Profit Boardroom (3,000+ members). I help business owners scale with AI agents, automation, and SEO.
- 400K+ YouTube subscribers
- 7-figure AI agency (Goldie Agency)
- Daily training inside the Boardroom
- Author of multiple AI automation playbooks
→ Get my best AI training inside the AI Profit Boardroom
Also On Our Network
- 🌐 Read on bestaiagentcommunity.com
- 🌐 Read on aiprofitboardroom.com
- 🌐 Read on aisuccesslabjuliangoldie.com
- 🌐 Read on aimoneylabjuliangoldie.com
Related reading
- DeepSeek V4 tutorial
- Free Claude Code workaround
- Claude Hermes agent
- Hermes agent OS
- Agentic AI OS
- AI Profit Boardroom
Want my best AI training
📺 Video notes + links to the tools 👉
🎥 Learn how I make these videos 👉
🆓 Get a FREE AI Course + Community + 1,000 AI Agents 👉
📞 Book a free strategy session with Goldie Agency 👉
The DeepSeek harness install is the lowest-friction onboarding I've seen in any AI coding tool this year — run those three lines and ship something today.